
Imagine stepping into a warm, cozy sanctuary in your own home, where stress melts away, muscles relax, and your mind finds peace. That’s the magic of a home infrared sauna. I first experienced this bliss at a wellness retreat, where a 20-minute session left me feeling rejuvenated and ready to tackle the world. When I decided to bring that experience home, I quickly realized that installing an infrared sauna is both exciting and daunting. From choosing the right model to navigating electrical requirements, there’s a lot to consider. In this guide, I’ll walk you through every step of the process, sharing expert insights, practical tips, and personal anecdotes to help you create your own wellness oasis. Whether you’re a DIY enthusiast or prefer a professional touch, this journey will equip you with everything you need to install a home infrared sauna with confidence.
Why Choose an Infrared Sauna for Your Home?
Infrared saunas are more than just a luxury—they’re a game-changer for health and relaxation. Unlike traditional saunas that heat the air to intense temperatures, infrared saunas use infrared light to warm your body directly, offering a gentler, more comfortable experience. Studies suggest benefits like improved circulation, reduced muscle soreness, and even stress relief, making them a popular choice for home wellness. According to Healthline, infrared saunas can also aid in detoxification and better sleep, which hooked me after my first session. But before you dive into installation, it’s worth understanding why they’re ideal for home use: they’re energy-efficient, require less space than traditional saunas, and are easier to install. My neighbor, a fitness buff, swears by his infrared sauna for post-workout recovery, and it’s now a staple in his routine.
Planning Your Infrared Sauna Installation
The journey to your home sauna starts with careful planning. Rushing into a purchase without considering space, budget, or electrical needs can lead to headaches. Here’s how to lay the groundwork for a seamless installation.
Assess Your Space
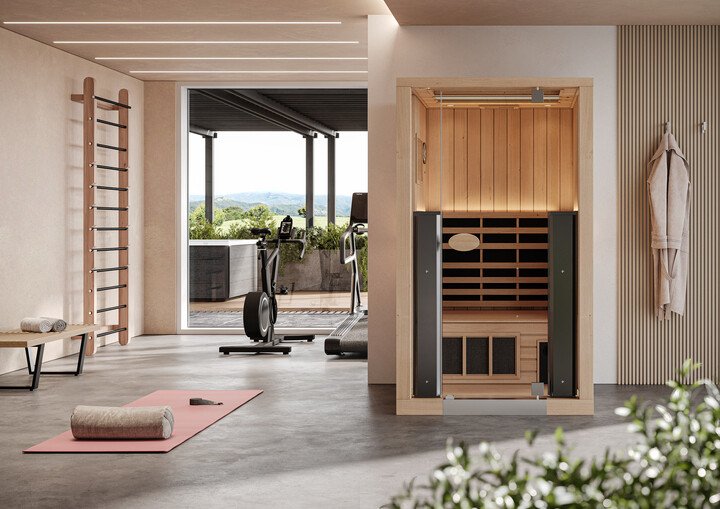
Finding the perfect spot for your sauna is like choosing the best seat at a concert—it sets the tone for the experience. Measure your available space carefully, keeping in mind that infrared saunas come in various sizes, from compact one-person units to spacious four-person models. A typical two-person sauna requires about 4’x4’ of floor space, as noted by Sun Home Saunas. I considered converting a corner of my basement, but a spare bathroom or a quiet bedroom nook can work too. Ensure the area has proper ventilation to prevent moisture buildup and is easily accessible for regular use. Privacy is key—nobody wants to relax while hearing the neighbor’s lawnmower.
- Indoor vs. Outdoor: Indoor saunas are easier to maintain and protect from weather, but outdoor setups can add a spa-like vibe to your backyard. My friend opted for an outdoor sauna, and it’s now the centerpiece of her garden retreat.
- Flooring: Choose a level, heat-resistant surface like tile or concrete. Avoid carpets, which can trap moisture and breed mold.
- Ceiling Height: Most saunas need 6–7 feet of vertical clearance. Check for low ceilings or overhead fixtures.
Set a Budget
Infrared saunas range from $1,000 for portable models to $7,000 for high-end custom kits. Factor in additional costs like electrical upgrades, ventilation systems, or professional installation. I set a budget of $3,500, which covered a mid-range two-person sauna and minor electrical work. Clearlight Saunas offers a helpful cost breakdown, noting that DIY kits can save money but require more effort. Be realistic about your DIY skills—overestimating your abilities can lead to costly mistakes.
Understand Electrical Requirements
Infrared saunas typically require a dedicated electrical circuit, often 120V for smaller models or 240V for larger ones. Check your home’s electrical panel capacity and consult a licensed electrician to avoid overloading circuits. Family Handyman emphasizes that improper wiring can pose fire risks, a lesson I learned when my electrician caught a potential issue during setup. Surge protectors are a must to safeguard your sauna’s electronics, and never use extension cords—they’re a safety hazard.
Choosing the Right Infrared Sauna
With countless models on the market, picking the right sauna can feel overwhelming. Here’s how to narrow it down based on size, materials, and features.
Size and Capacity
Consider how many people will use the sauna at once. A one-person sauna is perfect for solo relaxation, while a four-person model suits families or social gatherings. I chose a two-person sauna from JNH Lifestyles to share with my partner, and it fits perfectly in our spare room. Larger saunas require more power and space, so balance your needs with practicality.
Materials Matter
The wood used in your sauna affects both aesthetics and durability. Cedar is a popular choice for its pleasant aroma and resistance to moisture, while hemlock is hypoallergenic and budget-friendly. Celebration Saunas highlights hemlock’s low resin content, making it ideal for sensitive users. Avoid saunas with glued components, as they can release harmful VOCs when heated. My sauna’s cedar interior feels like a mini forest escape, enhancing every session.
Heater Types
Infrared saunas use three types of heaters: near, mid, and far infrared. Far infrared is the most common, penetrating deeper into the body for maximum benefits. Creative Energy explains that carbon heaters offer even heat distribution, while ceramic heaters heat up faster but may create hot spots. I opted for a carbon heater model for its energy efficiency and consistent warmth.
Additional Features
Modern saunas come with bells and whistles like chromotherapy lighting, Bluetooth speakers, and low-EMF panels. Chromotherapy, as noted by Verywell Fit, uses colored lights to boost mood, which I find surprisingly soothing. Low-EMF panels reduce electromagnetic exposure, a priority for health-conscious users. My sauna’s Bluetooth system lets me play calming playlists, turning sessions into a full sensory experience.
Comparison Table: Infrared Sauna Options
Comparing Popular Infrared Sauna Models
| Feature | Portable Sauna (e.g., SaunaPod) | 1–2 Person Sauna (e.g., JNH Lifestyles) | 4-Person Sauna (e.g., Clearlight) | DIY Custom Kit |
|---|---|---|---|---|
| Price Range | $500–$1,500 | $1,500–$3,500 | $4,000–$7,000 | $2,000–$5,000 |
| Space Required | 1m x 1m | 4’ x 4’ | 5’ x 6’ | Varies |
| Installation Time | 15–30 minutes | 1–2 hours | 2–4 hours | 1–3 days |
| Heater Type | Far Infrared | Carbon or Ceramic | Carbon | Customizable |
| EMF Levels | Low (3.8mG) | Low–Moderate | Ultra-Low | Varies |
| Features | Foldable, Red Light | Chromotherapy, Bluetooth | Premium Wood, Surround Sound | Fully Customizable |
| Best For | Budget, Small Spaces | Couples, Home Use | Families, Luxury | DIY Enthusiasts |
This table helped me visualize my options, and I hope it guides you toward the perfect sauna for your needs.
Step-by-Step Installation Guide
Once you’ve chosen your sauna, it’s time to roll up your sleeves (or hire a pro). Here’s a detailed guide to installing your infrared sauna, based on my experience and expert advice.
Step 1: Prepare the Space
Clear the area of flammable materials and ensure the floor is level. I vacuumed my basement corner thoroughly to avoid dust buildup. If you’re installing outdoors, The Home Depot recommends a solid foundation like concrete to withstand weather. Install a ventilation system or ensure a nearby window can be opened to maintain air quality.
Step 2: Assemble the Sauna
Most saunas come as pre-cut kits with step-by-step instructions. Start by laying the base panel, then assemble the walls, securing them with bolts or interlocking joints. My JNH sauna took about two hours to assemble with my partner’s help, though we had a good laugh when we initially put a panel backward. For DIY builds, Kuhl suggests using high-quality insulation and foil vapor barriers to retain heat.
Step 3: Install Infrared Panels
Position the infrared panels according to the manufacturer’s layout, ensuring even heat distribution. Run wiring inside the walls for a clean look, or use external conduits if retrofitting. My electrician handled this step, as I didn’t trust my wiring skills. Double-check that panels are UL-listed for safety, as advised by Finnleo.
Step 4: Connect Electrical Components
Plug the sauna into a dedicated outlet or hardwire it if required. Test the control panel, lights, and heaters to ensure everything works. I accidentally set the timer too high during my first test, nearly turning my session into a marathon sweat. A surge protector is non-negotiable to protect against power surges.
Step 5: Add Finishing Touches
Install benches, lighting, and accessories like towel racks. I added a small shelf for my water bottle, a game-changer for staying hydrated. Wipe down surfaces with a non-toxic cleaner to remove dust before your first session.
Safety and Maintenance Tips
A well-maintained sauna is a safe sauna. Here are tips to keep your investment in top shape.
- Hydrate: Drink water before and after sessions to prevent dehydration, especially since infrared saunas induce heavy sweating.
- Clean Regularly: Wipe down benches and walls with a damp cloth to prevent mold. I use a vinegar-water mix weekly.
- Check Wiring: Inspect electrical components monthly for wear. My electrician caught a loose connection during a routine check, saving me from potential issues.
- Limit Sessions: Start with 10–15 minutes and gradually increase to 30–60 minutes, as suggested by Verywell Fit.
- Avoid Alcohol: Using a sauna after drinking can lead to dizziness or worse, so save the wine for post-session relaxation.
Common Challenges and How to Overcome Them
Even with planning, hiccups happen. Here’s how to tackle common installation issues.
- Space Constraints: If space is tight, consider a portable sauna like the SaunaPod, which folds away when not in use. My friend in a small apartment loves hers.
- Electrical Overload: If your panel can’t handle the load, upgrade to a higher-capacity circuit. This cost me an extra $200 but was worth it for safety.
- Assembly Errors: Double-check instructions and label panels before starting. A YouTube tutorial saved me when I got stuck.
- Heat Distribution: If heat feels uneven, reposition panels or opt for carbon heaters, which excel at uniform warmth.
FAQ: Your Burning Questions Answered
How much does it cost to install a home infrared sauna?
Costs vary widely, from $500 for portable models to $7,000 for luxury saunas. Add $200–$1,000 for electrical work and $100–$500 for ventilation or accessories. DIY kits can save money but require time and skill.
Can I install an infrared sauna myself?
Yes, if you’re handy and follow instructions. Pre-cut kits are beginner-friendly, but electrical work should be left to professionals. I tackled assembly but hired an electrician for wiring.
How long does installation take?
Portable saunas take 15–30 minutes to set up. Pre-cut kits require 1–4 hours, while custom DIY builds can take 1–3 days, depending on complexity.
Are infrared saunas safe for daily use?
Yes, for most healthy individuals, 10–60-minute sessions are safe, per Healthline. Consult a doctor if you have conditions like heart disease or are pregnant.
What’s the difference between infrared and traditional saunas?
Infrared saunas use light to heat your body directly at lower temperatures (120–140°F), while traditional saunas heat the air to 150–180°F. Infrared feels less intense and is easier to install at home.
Conclusion: Your Path to Sauna Bliss
Installing a home infrared sauna is more than a home improvement project—it’s an investment in your health, relaxation, and happiness. From the moment I first stepped into my sauna, I knew it was worth every minute of planning and every dollar spent. The process can feel overwhelming, but with careful preparation, the right sauna, and a blend of DIY enthusiasm and professional help, you’ll create a sanctuary that transforms your daily routine. Whether you’re soothing sore muscles, unwinding after a long day, or simply indulging in self-care, your sauna will become a cherished part of your home.
Start by assessing your space and budget, then explore models that match your needs. Use the comparison table to weigh options, and follow the step-by-step guide to ensure a smooth installation. Don’t skip safety checks or maintenance—they’re key to long-term enjoyment. If you’re still unsure, reach out to reputable brands like Clearlight or JNH Lifestyles for guidance, or consult a local electrician for peace of mind.
As you embark on this journey, picture yourself sinking into the warmth of your new sauna, a playlist humming softly, and the world fading away. That’s the reward waiting for you. So, what’s your next step? Are you ready to turn your home into a wellness retreat? Share your plans or questions in the comments—I’d love to hear about your sauna dreams!